How to Install Dart & VS Code in Mac, Windows & Linux for 2025
A Step by Step Guide to Setting up Dart Along with VS Code, and Writing Hello World Program in Dart 2025
In this tutorial I have described steps to setting up dart in mac along with VS Code IDE, and write your first program in dart in VS Code. This tutorial is a complete and step by step guide to writing your hello world dart program in 2025.
Dart is an open-source, object-oriented programming language that is used to create mobile, and web apps, and websites. I have explained the programming language in my other article that I have given the link of at the end of this article.
VS Code is Visual Studio Code. It is an integrated Development Environment that is widely liked and used for development by most of the developers. It’s simple interface, extensive short key support, and suggestions feature smoothen the software development experience.
Step 1: Download VS Code
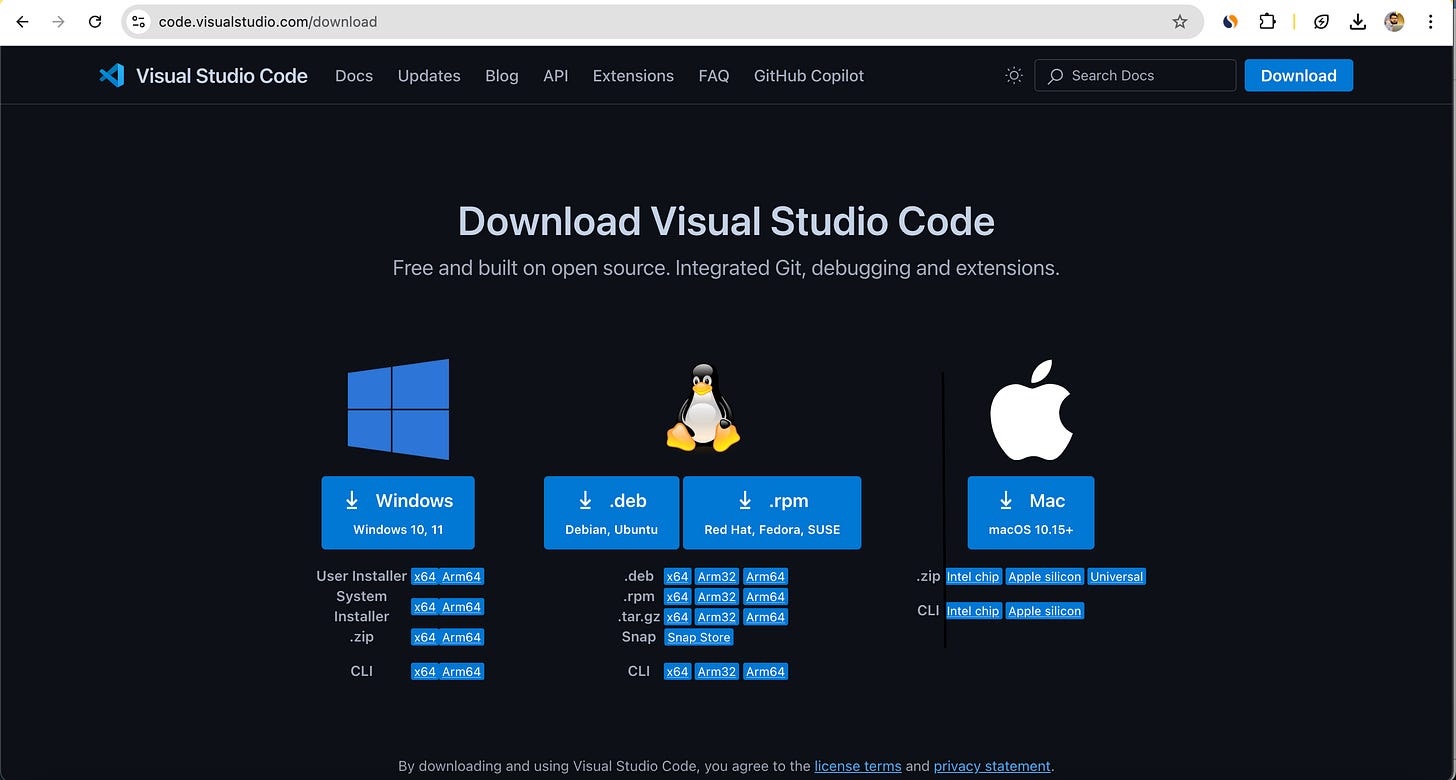
First of all, you need to download the VS Code IDE from the official website. I have given link below:
https://code.visualstudio.com/download
The link will redirect you to the download page. Once you click on download button, then your download will start. The download size is normal, and it won’t take long to finish.
Once the download is complete, just click on the download to install it. You will be redirected to VS Code “Terms & Conditions” page. Read the all carefully, and accept them to go ahead with the installation.
After that just keep on following the instruction, and pressing “Next” button until the installation is finished. You won’t face any difficulty in this process as it is simple to set it up. The process is same for most operating systems like windows, mac, and Linux.
Step 2: Setup Dart
After installing the VS Code successfully, its time install dart in your computer. This process varies according to operating systems. I have shown the steps for each below.
2.1: Windows
Firstly, you need to download the Dart SDK from official website. The link is given below:
https://dart.dev/get-dart
Once the download is complete, simply extract that to the location of your preference in your computer, e.g.: C:/users/dart
After you have extracted the dart SDK to the location of your choice, the last step for windows setup is to setup “Environment” variable. It is mandatory in order to make your computer recognize Dart.
Just search for “Environment Variables” in windows global search. Once you find that, then look for “System Variables”. In the system variables, you will see “Path”. You are close to finishing it up.
Here you will find edit button, just click on it, and add the path of dart folder up to its “Bin” folder. It is essential to add path variable correctly, and make sure that it is add up to “Bin” folder, otherwise it’s not going to work.
2.2: MacOS
Setting up dart in mac is easier compared to windows. If you have installed “Homebrew” it’s even simpler, and you can skip the step 1.
Check if you have Homebrew Installed
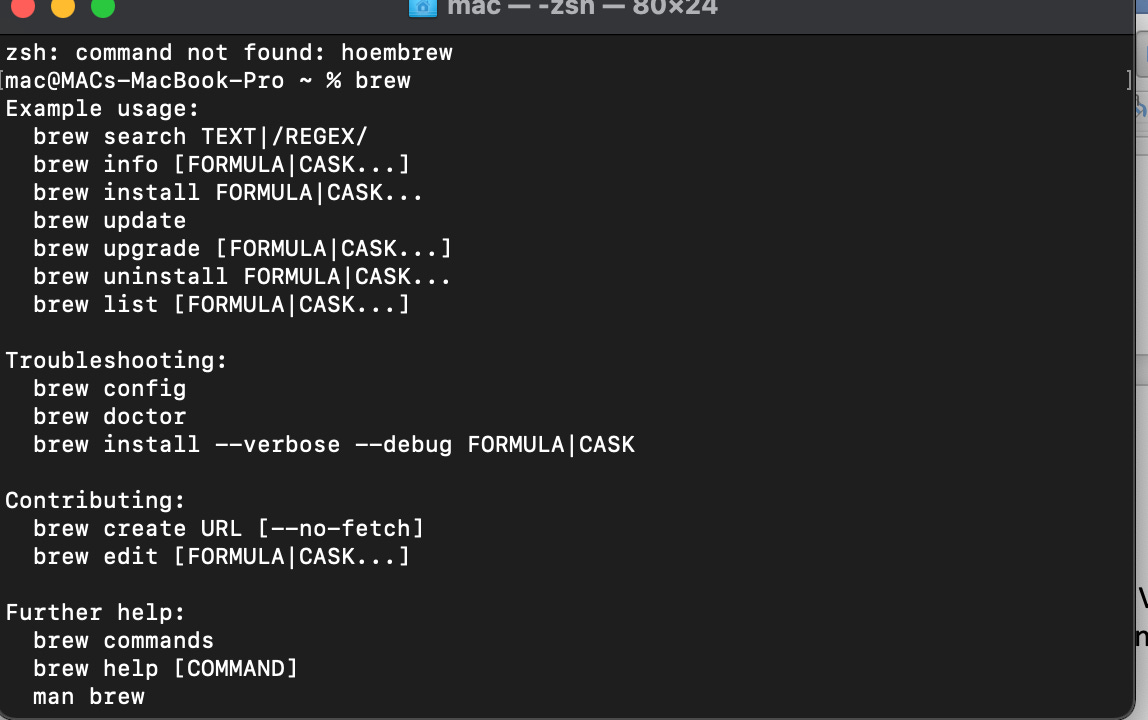
If you are not sure whether you have installed Homebrew or it, simply open the terminal app of your computer, and type “brew” and press enter.
If you don’t see “command not found” then you have Homebrew installed. In other case follow step 1.
Step 1: Install Homebrew
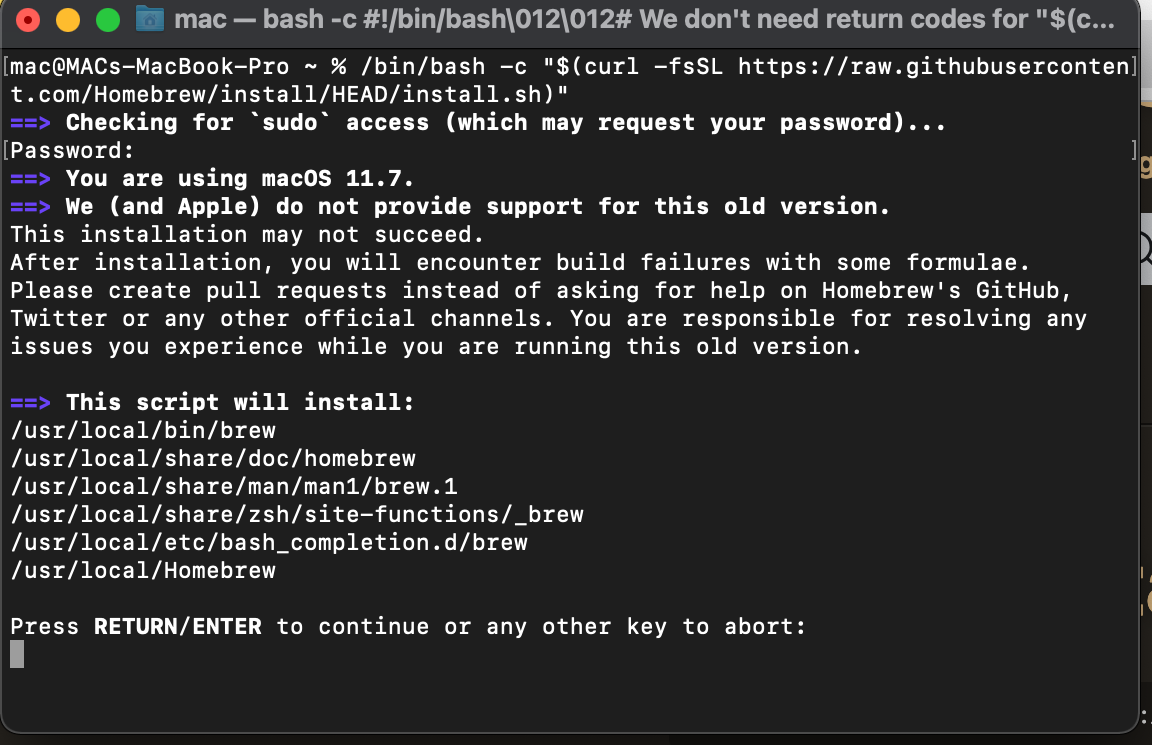
Installing Homebrew is a simple process. All you need to do is to paste the following command in the terminal app of your mac computer.
/bin/bash -c “$(curl -fsSL https://raw.githubusercontent.com/Homebrew/install/HEAD/install.sh)"
After pasting this command, just press enter, and you will be asked to enter the password of your computer, followed by some information about your mac, and installation details, and it will ask you to press enter to continue, and you should follow.
The Homebrew will be installed in a while. You can also check if it is installed correctly by typing “brew” in terminal app as I have mentioned above.
Step 2: Install Dart
After successful installation of Homebrew, it is correct time install the Dart. For that just paste the following command in the terminal app.
brew install dart
Just press enter, and dart installation process will begin. After some time when it is finished, you can check the dart version by pasting following command in the terminal.
dart —version
if you are able to see the version like following, then dart is setup correctly.
Dart SDK version: 3.4.3 (stable) (Tue Jun 4 19:51:39 2024 +0000) on “macos_x64”
At this point, the dart should be setup in your computer, and if you have Linux operating system the process is same except following.
Instead of “brew install dart” in mac, paste following command in the terminal.
sudo snap install dart –classic
Step 3: Install Dart Extension in VS Code
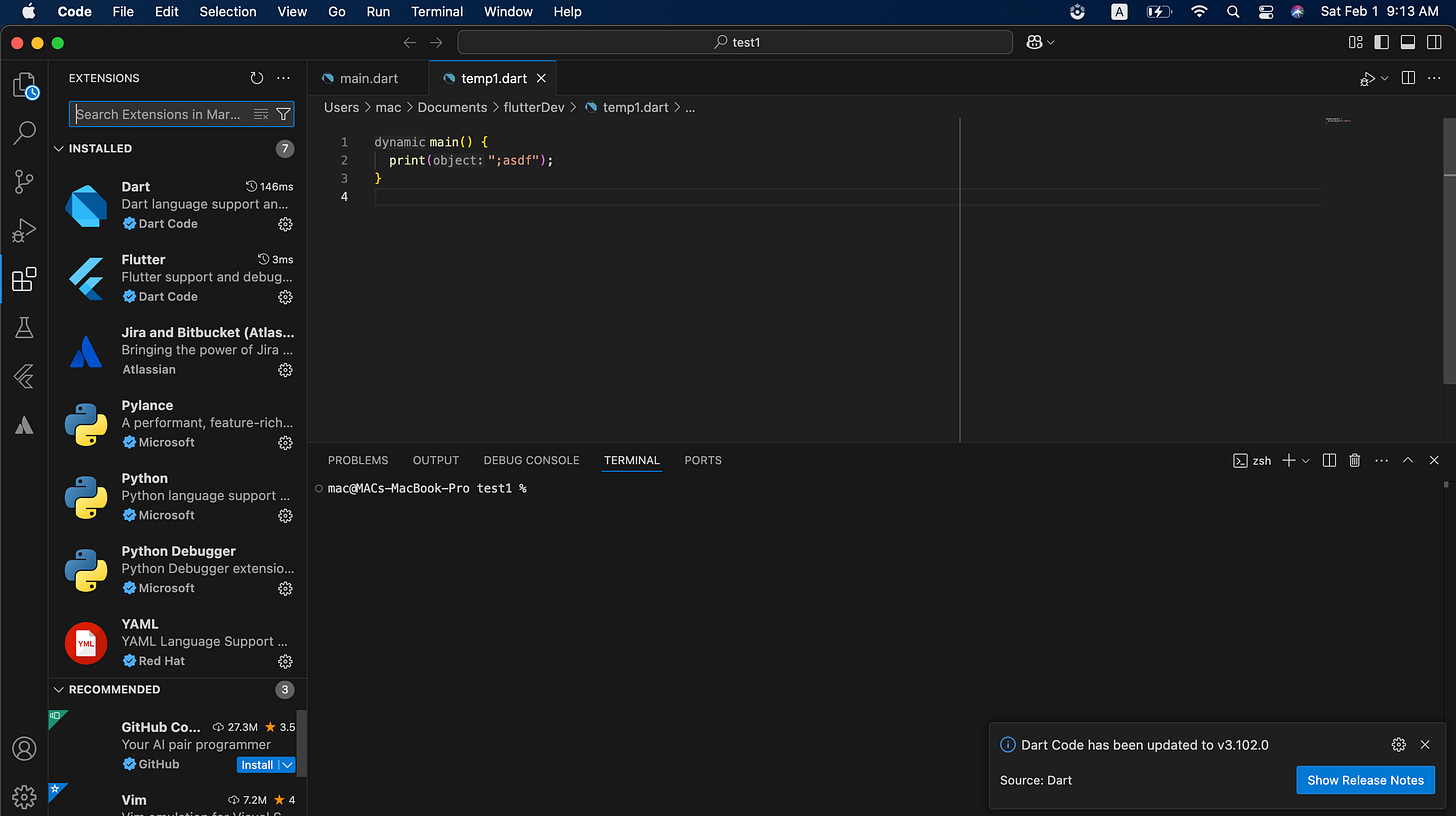
After successful installation of VS Code, and Dart SDK, the final step is to install the Dart extension in the VS Code before getting started with writing your first dart program.
To install Dart extension, go to the “Extensions” tab or press (CMD + Shift + x), then search for “dart”, and install the extension. After the extension is installed, just restart the VS Code.
Congratulations! The installation process is finished. Now you are good to write your first program in dart.
Write First Dart Program
To write first program in dart in VS Code, just open VS Code, and you will an option to create new file.
Once you create new file, just press CMD + S in mac, and Ctrl + S in windows to save the file. Make sure to end the file name with “. dart” extension e.g.: myFirstProgram.dart.
Once you have created the dart file, now write the following code to print “Hello World” in the console. Console in the portion where you can the output of the program.
main(){
print(“Hello World”);
}
main(): It is called main function. It is starting point of the dart code, and all the code runs from here. Any line of code outside this is not recognized, and not executed.
print(): It is called print function that prints on the screen whatever we write in this function in between small braces. e.g. “Hello World” in this case.
Note that “;” is called termination sign. It is mandatory to add this at the end of every line.
Once you have written the code, you can execute it. To execute the code, find the “Run” option the top, and when you hover or click the “Run” button, you will see “Run without Debugging” on option on 2nd place. Just click on that and your program will be executed and you will be able to see the output in the console. Alternatively, you can press Cmd + F5 in mac, and Ctrl + F5 in windows.
That’s how you can setup dart in your computer, and write and execute your first dart code. I hope this tutorial helped you. Thank you for reading this article.


